Before you upload your contact list, we configure the call form to match the data exactly from your contact list.
As a backup, you can create 1 to 2 extra fields in the call form. This allows you to add more information even after uploading contacts by renaming these backup fields.
Step 1: Setting up the Call Form
1. Create a new contact list.
2. Navigate to the script and call log.

3. Click on 'Edit Form.
4. Click on the green '+' and select the suitable option from the pop-up. To do this, click the green '+' again next to the respective field."
- Make sure the number of form fields matches the columns in your contact list, but only include the ones you want the talent to see.
- Each form field represents information from a specific column in your uploaded contact list.
- When uploading the contact list, you can link form fields to their respective columns.

5. Rename the form fields to match the labels at the top of your contact list, and then save the call form.
Remember to save your changes to avoid losing them. You can freely arrange the order of the form fields as long as no contact data has been uploaded yet.
Step 2: Getting Your Contact List Ready for Upload
To ensure the system recognizes your data, make sure it's formatted correctly.
Phone number format: Use +49... or 49... without any special characters.
Allowed column separators: Choose between Comma, Semicolon, or Tab.
Contact list file format: Save it as CSV UTF-8 (you can select this format when saving in Excel).
1. Make sure the phone numbers in your contact list are formatted correctly.

2. Visit the Contacts section and click on Import Contacts from CSV file.
3. Drag and drop your contact list into the upload field or choose it from the explorer.
4. Phone numbers will be recognized automatically; if not, assign them manually in the phone number column.
5. Match the other columns with the form fields you set up in the call form.
6. Finish the data upload by clicking on Import Data.

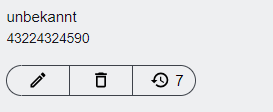
If you fill in the 'Name' field, it will show the contact's name in the contact overview. If you don't assign anything to the 'Name' field, the contact will appear as 'Unknown' in the overview.
Contact view with correct assignment.

View of the contact with an incorrect assignment.